AMIGURIMI STITCH GUIDE: How to do a BACK POST single crochet (BPSC)
Hello there! Today we are going to learn how to do the back post single crochet. Welcome to one of my favorite amigurumi stitch! BPSC!
This stitch
The US abbreviation is BPSC. It is very common to see in Amigurumi patterns, and it’s mostly used when you want to make an edge on your detail.
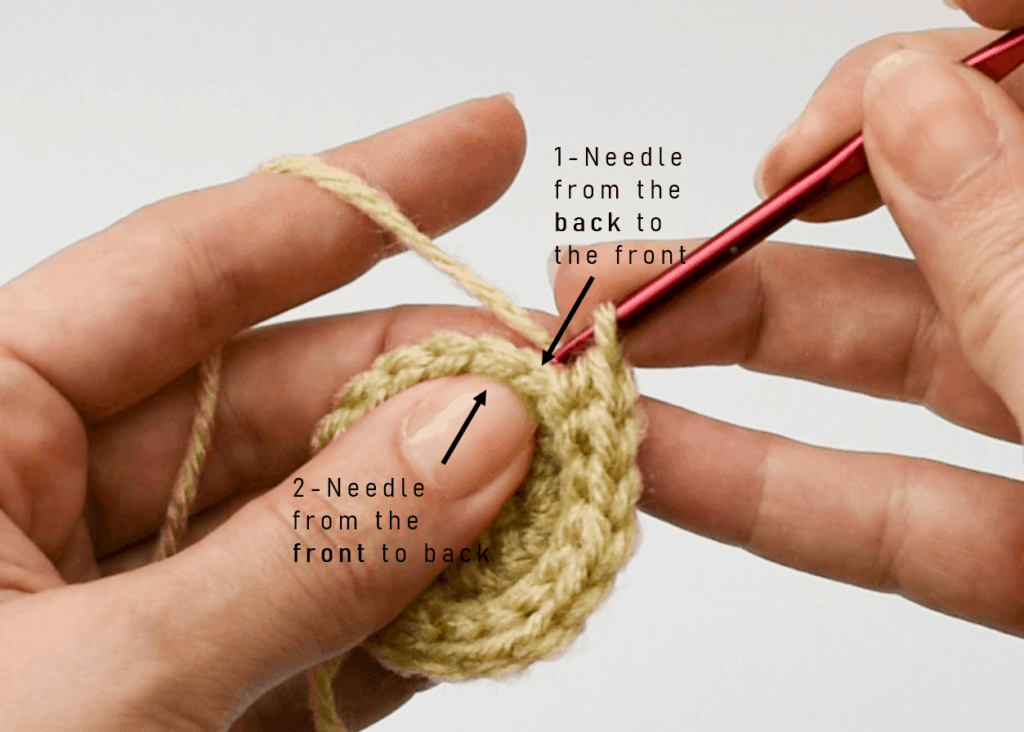
The back post is when you use the connection between two stitches, by introducing your needle inside the stitch from inside of your amigurumi and continue introducing the needle in the next stitch from the outside of your amigurumi.
I spoke about some other basic stitches previously, and also some amigurumi tricks, like how to perfect finish of your toy. Check it out if you don’t know this technique yet!
Don’t worry! We will go step by step of the BPSC with images and at the end of this article there’s a small video with all movements together.
Let’s begin!
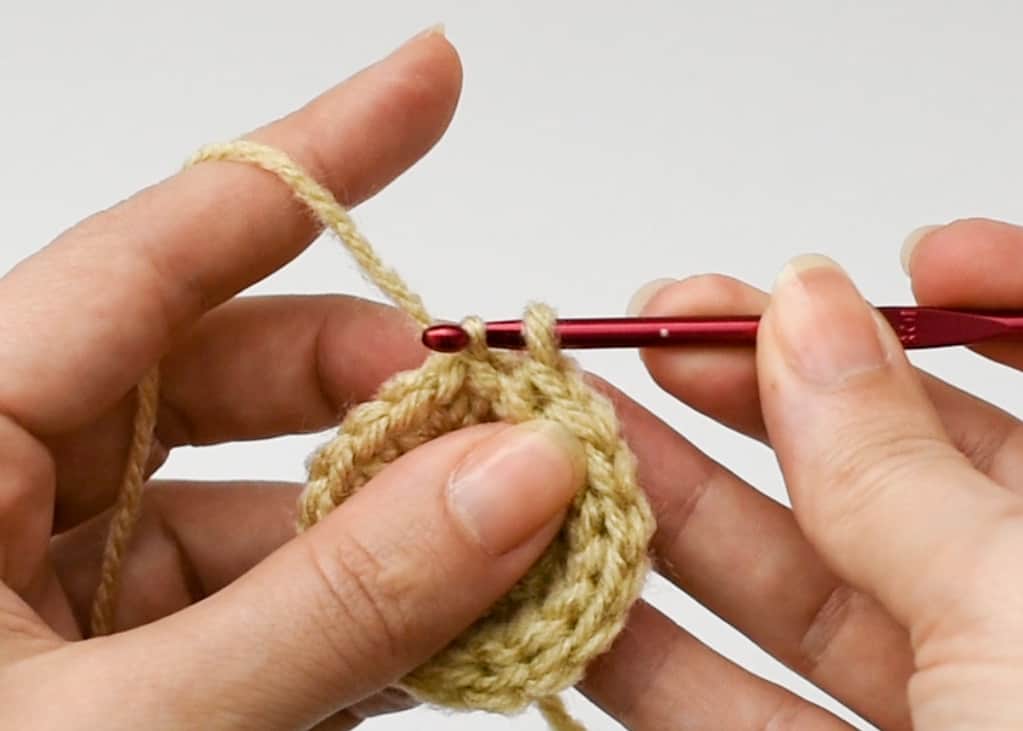
Here you are going to introduce the needle inside the stitch FROM THE BACK of your work (from inside of your amigurumi)
And continue by introducing the needle inside the stitch next to it
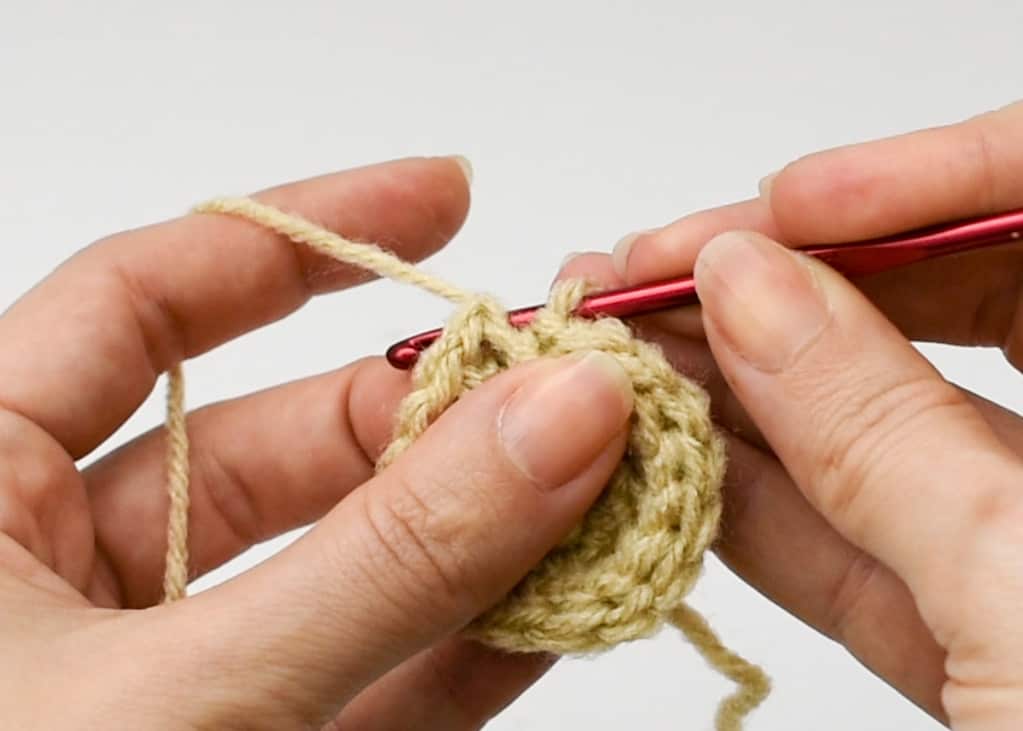
Now your needle should look like this.
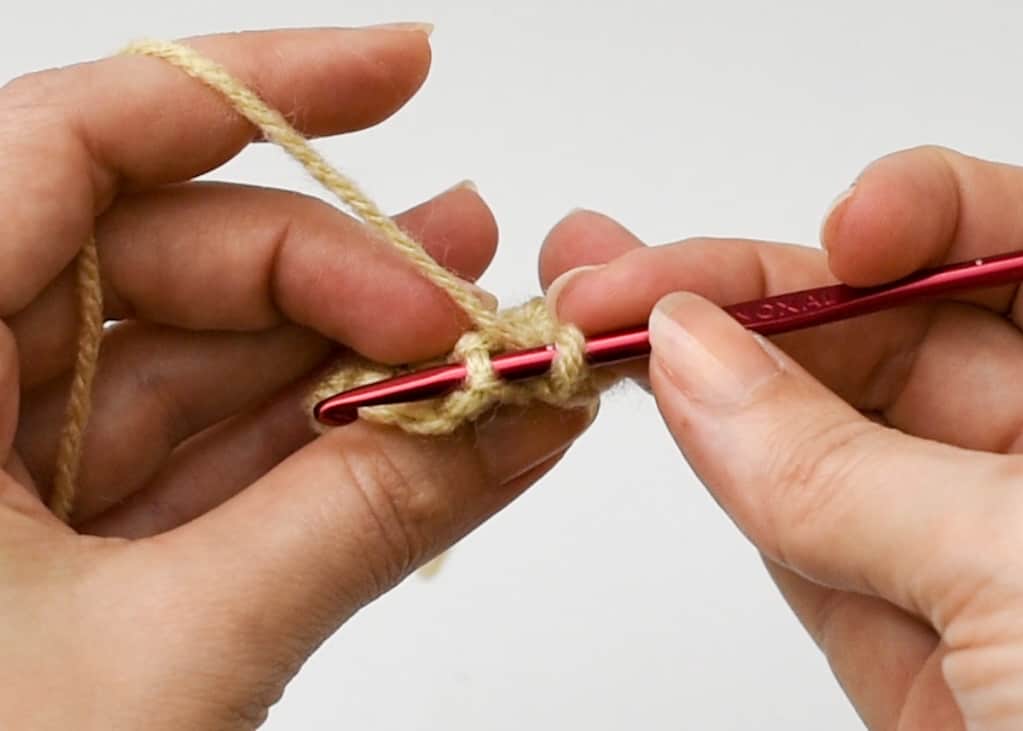
Then you bring the yarn inside (like the image), and continue the single crochet.
If you don’t know how to single crochet, click here.
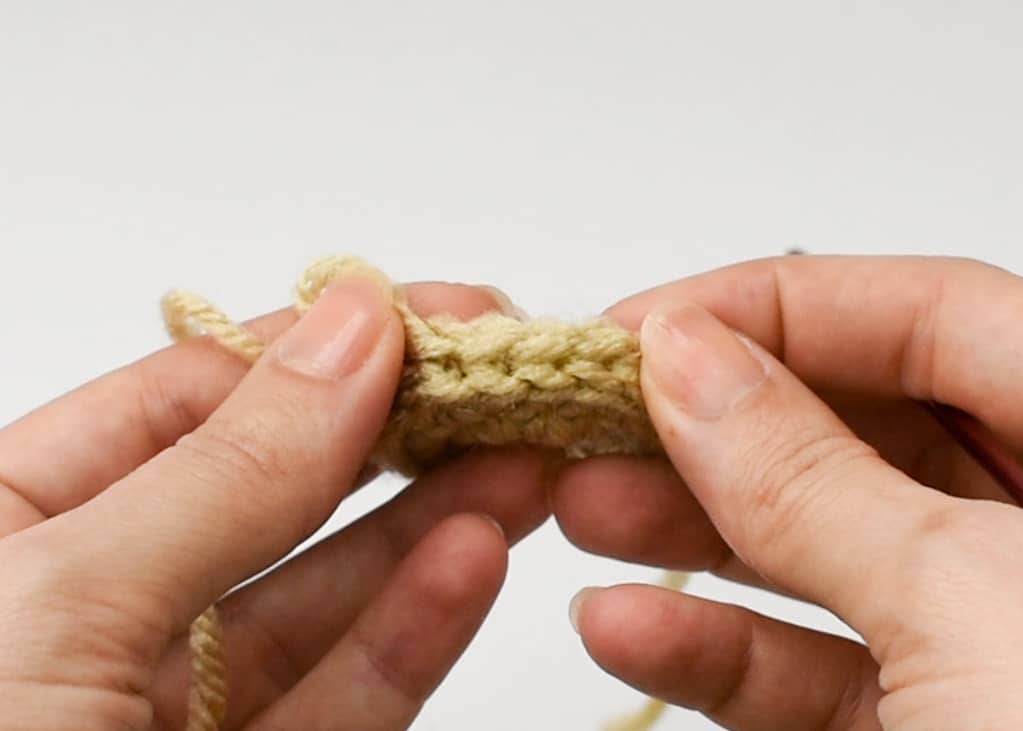
This movement will make your single crochet to be on top of the row you just worked on it, giving this sharp edge effect on your detail.
Press play and check in out the full movement of this stitch!
Now that you know how to BPSC, I’ll leave a few tips that I think you should always have in your mind when crocheting amigurumi.
TIPS:
Most important to remember is to keep your stitch with a tight tension, this way, you won’t have any see-through gaps.
To help me keep my stitches tight, I prefer using yarn for a thicker needle than the one I would be using for the Amigurumi.
Always count your stitches after every row, so you will make sure to have the total amount of stitches.
Use a piece of yarn to mark the last stitch, so you won’t miss where the beginning and end of your row is!
If you are ready to start making your toy, take a look in all of my patterns here! And, if you love a beginner-friendly free amigurumi pattern, click here!!!
I hope this was helpful to you and if you have any questions please let on the comments below.
I’ll be happy to help you finish your amigurumi crochet toy!