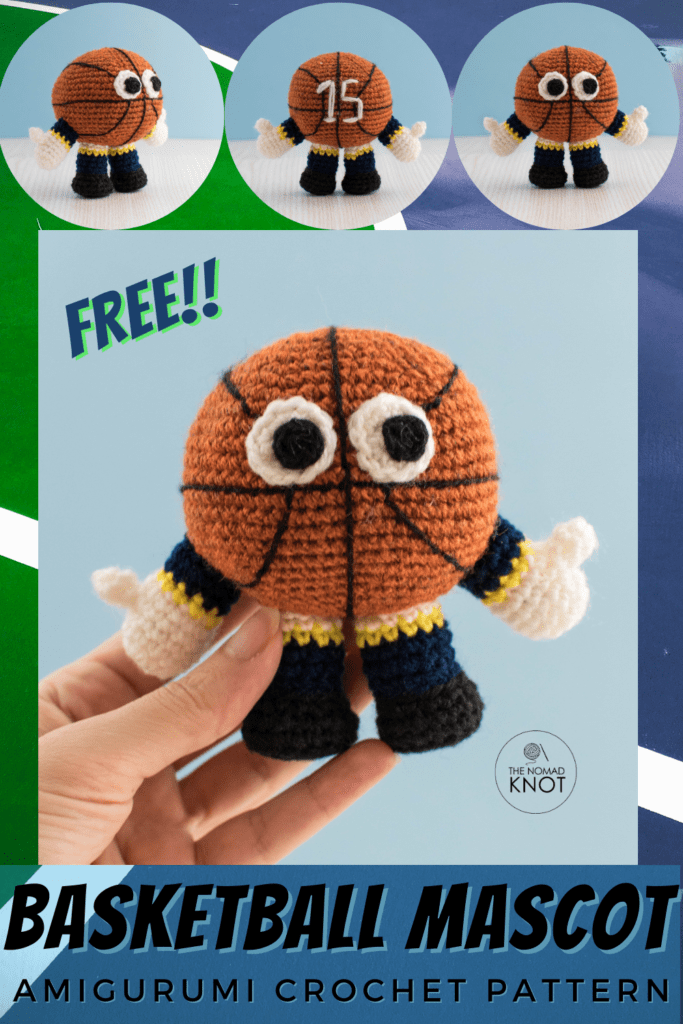
Hello everyone and welcome back! Today I share this basketball mascot free amigurumi pattern that you can adapt to your favorite team! If you want to go straight to the pattern, just scroll down! Or, you can stick around! It might have some nice information for you!
As with most of my creations, this amigurumi toy is a gift! And this time is for my brother-in-law. It was his birthday last month, but since it was a busy month for many of us, we only had time to celebrate last weekend. I had a lot coming up with Halloween patterns, and some other gifts I had to make like this little fox for my niece, so, not have enough time to create something for him.
Pin it for later!
I am currently working on a Halloween pumpkin table runner, it’s looking beautiful and it is part of my plan for Halloween home décor. If you want to check it, click here.
But, back on the basketball amigurumi mascot! With a lot going on this year, my brother-in-law had to find a spot in the house to become his new office, a situation that a lot of us can relate to. Plus, they have five kids! I guess now you can imagine how busy the house is, and how is to adapt to all these new ways of living. With that in mind, my husband and I were thinking about what to get him for a gift.
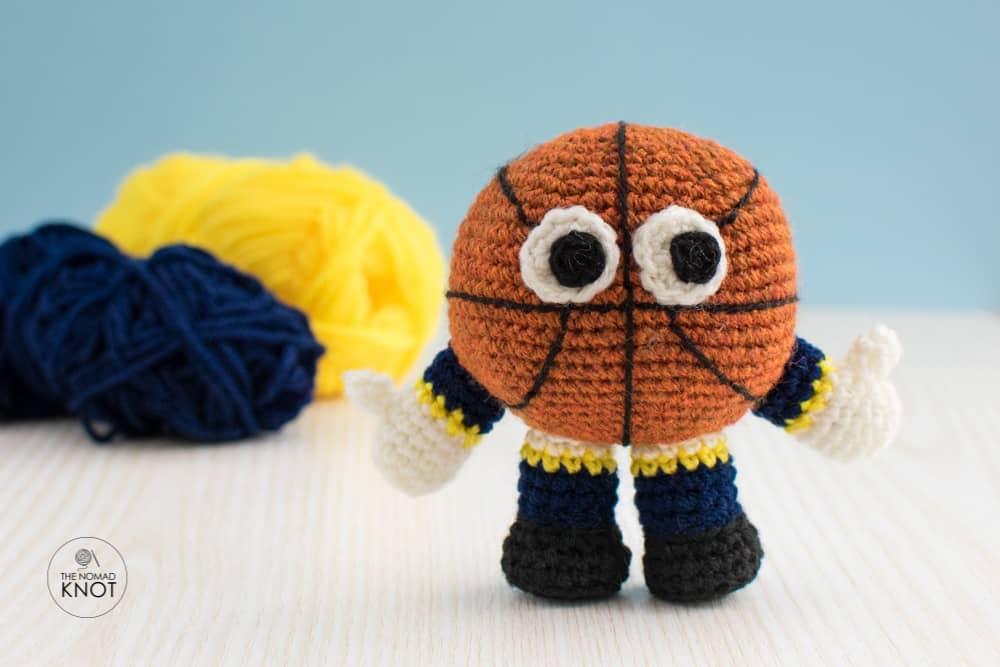
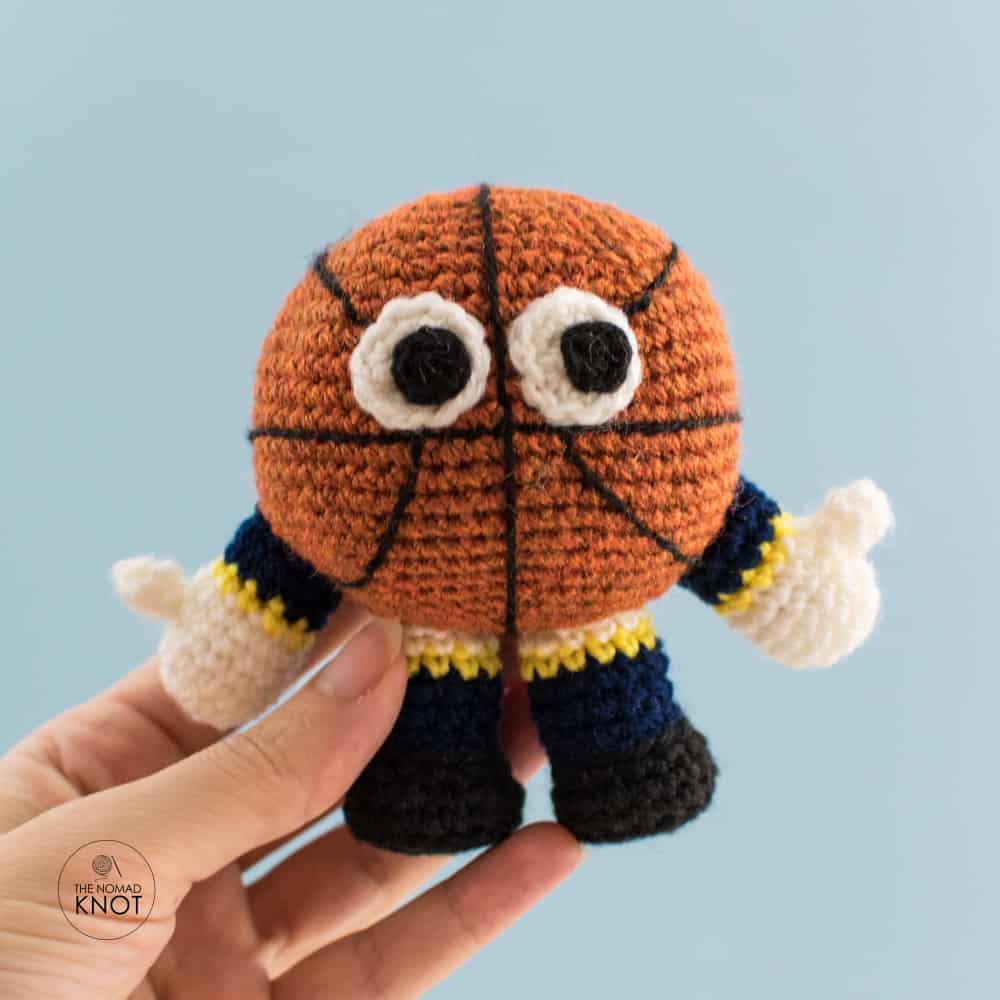
And so, we came up with this coloring book I found on Amazon, it’s for grown-ups and I know is something that he already made a few comments about it. And on top of that, I develop this amigurumi basketball mascot that he can leave on his office table. It has his favorite basketball team color, it might make him smile with its funny face plus, he can squeeze the ball anytime he needs some stress release!
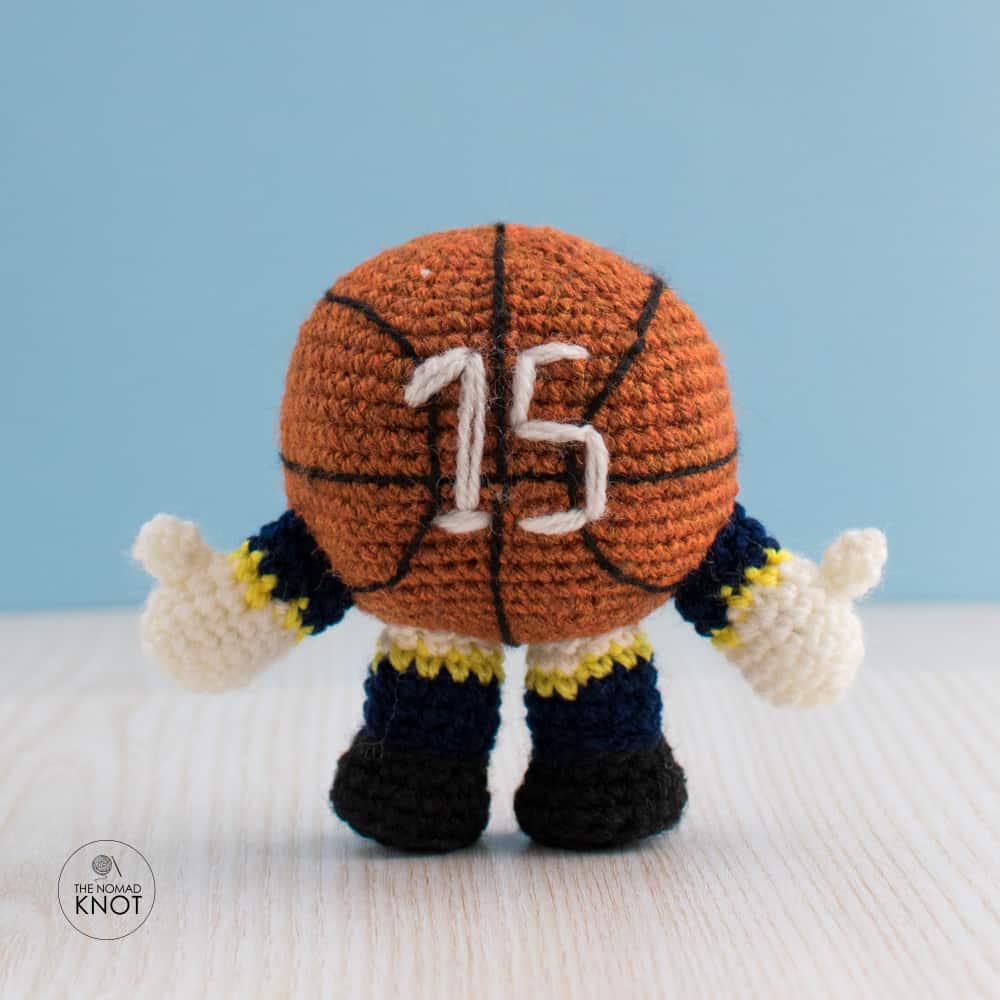
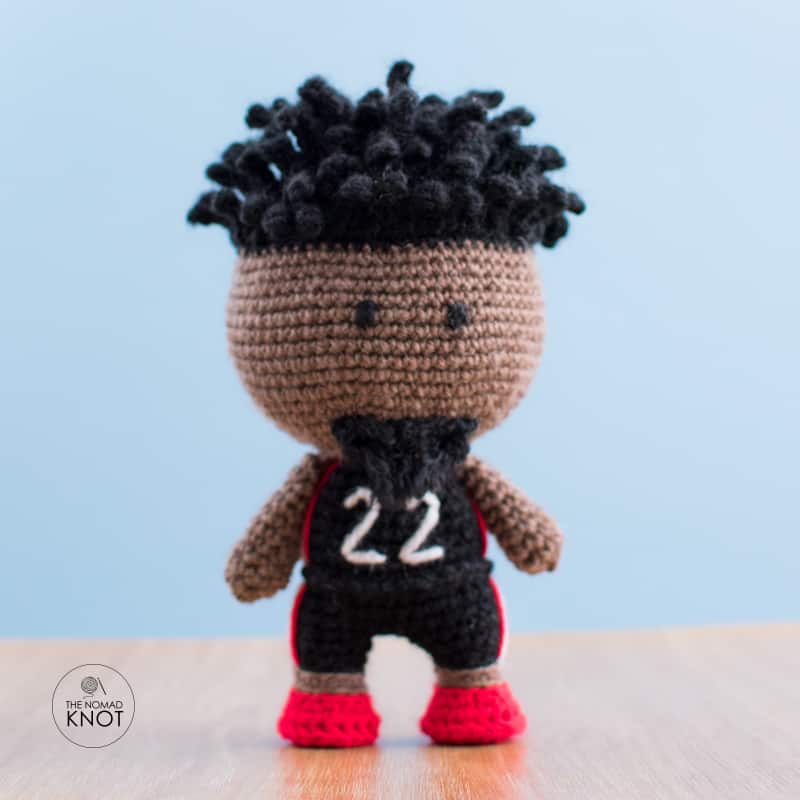
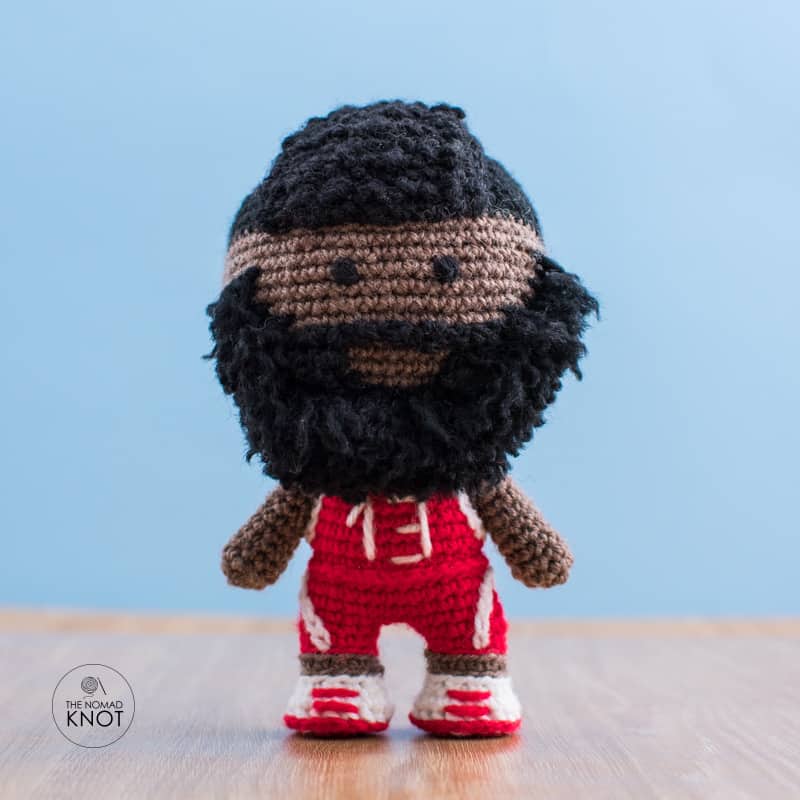
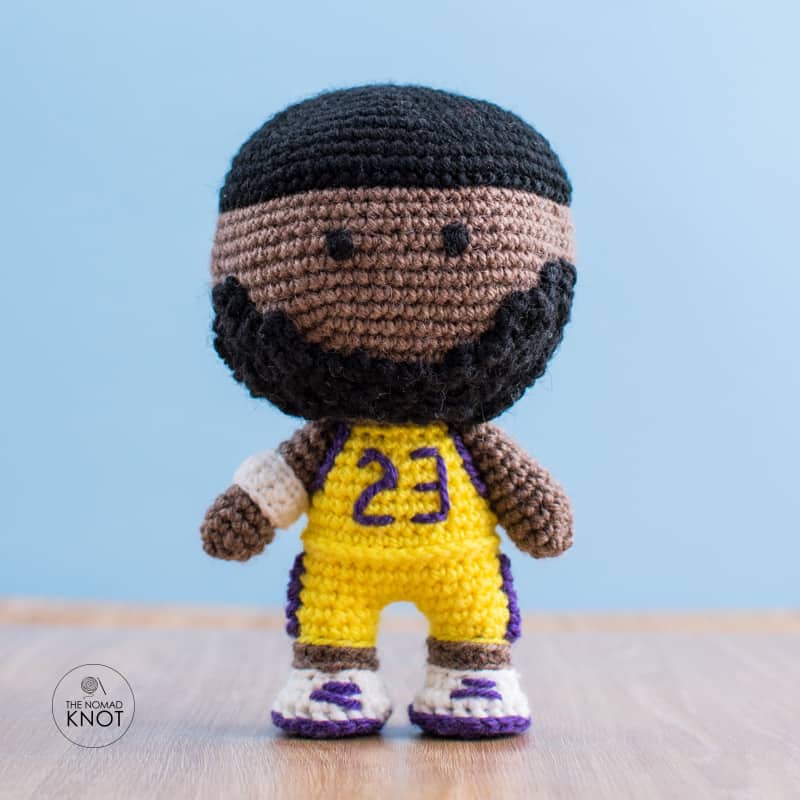
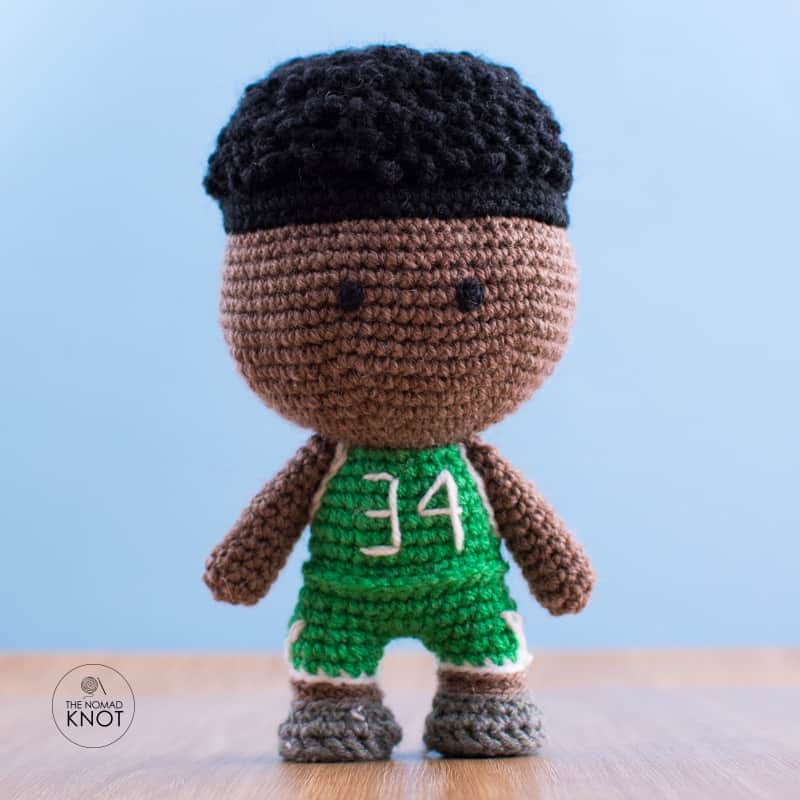
For making this basketball mascot amigurumi pattern, I choose the colors of his favorite basketball team called Denver Nuggets which are yellow, blue, and white, and the number of his favorite basketball player, Nikola Jokic (15).
So here, you can change the colors for the basketball team you want and you can embroider any number on its back. This way, you can have a very well thought personalized gift!
Before we start, I will leave down here links to every stitch and technique I used on this amigurumi pattern in case you need them. Take a time to read how I finish my crochet balls, I am always surprised at how many amigurumi lovers still don’t know about this technique!
- Easy way to make a magic ring
- How to do single crochet (SC)
- The perfect way to finish your amigurumi.
- How to increase (inc)
- What is invisible decrease (invDEC or DEC)
- How to back post single crochet (BPSC)
And, some amigurumi tips that are always good to keep in mind!
TIPS:
- The most important to remember is to keep your stitch with a tight tension, this way, you won’t have any see-through gaps.
- To help me keep my stitches tight, I prefer using yarn for a thicker needle than the one I would be using for the Amigurumi.
- Always count your stitches after every row, so you will make sure to have the total amount of stitches.
- Use a piece of yarn to mark the last stitch, so you won’t miss where the beginning and end of your row are!
BASKETBALL MASCOT AMIGURUMI FREE PATTERN
MATERIAL: 2mm crochet hook, orange white yellow, blue, and black yarn dk yarn, stuffing material, sewing needle, and scissors.
The finished size must be around 10cm.
BALL
With orange color yarn start,
- 1 row 6sc in a magic ring
- 2 row 6inc Total 12sts
- 3 row (1sc, 1inc) repeat 6 times Total 18sts
- 4 row 2sc, 1inc) repeat 6 times Total 24sts
- 5 row (3sc, 1inc) repeat 6 times Total 30sts
- 6 row (4sc, 1inc) repeat 6 times Total 36sts
- 7 row (5sc, 1inc) repeat 6 times Total 42sts
- 8 row 6sc, 1inc) repeat 6 times Total 48sts
- 9 row (7sc, 1inc) repeat 6 times Total 54sts
- 10 row (8sc, 1inc) repeat 6 times Total 60sts
- 11 to 19 row 60sc
- 20 row (8sc, 1dec) repeat 6 times Total 54sts
- 21 row (7sc, 1dec) repeat 6 times Total 48sts
- 22 row (6sc, 1dec) repeat 6 times Total 42sts
- 23 row (5sc, 1dec) repeat 6 times Total 36sts
- 24 row (4sc, 1dec) repeat 6 times Total 30sts
- 25 row (3sc, 1dec) repeat 6 times Total 24sts
- 26 row (2sc, 1dec) repeat 6 times Total 18sts
Stop here for stuffing the ball!
- 27 row (1sc, 1dec) repeat 6 times Total 12sts
Cut the yarn, fasten it off, and hid the remaining tail inside the ball.
LEGS
With black yarn start
- 1 row 6sc in a magic ring
- 2 row 6inc Total 12sts
- 3 row (1sc, 1inc) repeat 6 times Total 18sts
- 4 row 18blsc
- 5 row 18sc
- 6 row (1sc, 1dec) repeat 6 times Total 12sts
Change to blue color yarn
- 7 row 12blsl
- 8 to 10 row 12sc
Change to yellow
- 11 row 12sc
Change to white
- 12 row 12sc
Cut the yarn, fasten off and leave a tail for sewing.
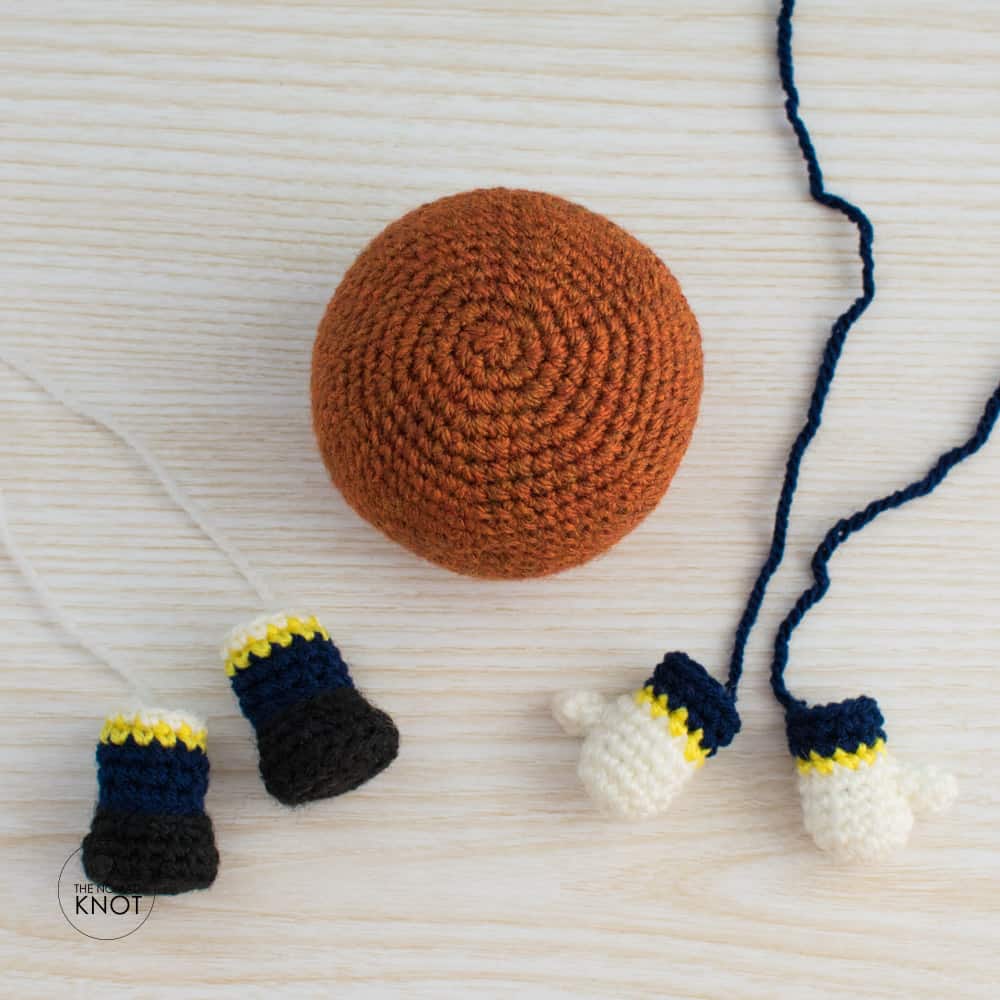
HANDS
Start by the toe. With white yarn start,
- 1 row 4sc in a magic ring
- 2 and 3 row 4sc
Cut the yarn, fasten it off and make another one.
Now start the hand, with white yarn make
- 1 row 6sc in a magic ring
- 2 row 6inc Total 12sts
- 3 row 12sc
- 4 row 2sc, 2sc (connecting with 2sts of the toe), 8sc
For the next row, you will make the round going around the toe, so will be 2sc normally, the next 2 sc will be on the leftover sts of the toe, and continuing to the normal 8sc on the hand.
- 5 row 12sc
- 6 row 12sc
Change to yellow yarn
- 7 row 12sc
Change to blue yarn
- 8 and 9 row 12sc
Cut the yarn, fasten it off and leave a tail for sewing. This will be the left hand, for the right hand, follow the same steps until row 4
For row 4 of the right hand, make 8sc, 2sc (connecting with 2sts of the toe), 2sc.
And continue as before.
This is for the connecting part of the detail (the changing colors) to be always facing backward. And with toes pointing up!
EYES
With white yarn start,
- 1 row 6sc in a magic ring
- 2 row 6inc, join with SL Total 12sts
Cut the yarn, fasten it off and leave a tail for sewing. Make two of this detail.
With black yarn,
- 1 row 6sc in a magic ring. Join with an SL.
Cut the yarn, fasten it off and leave a tail for sewing. Make two of these.
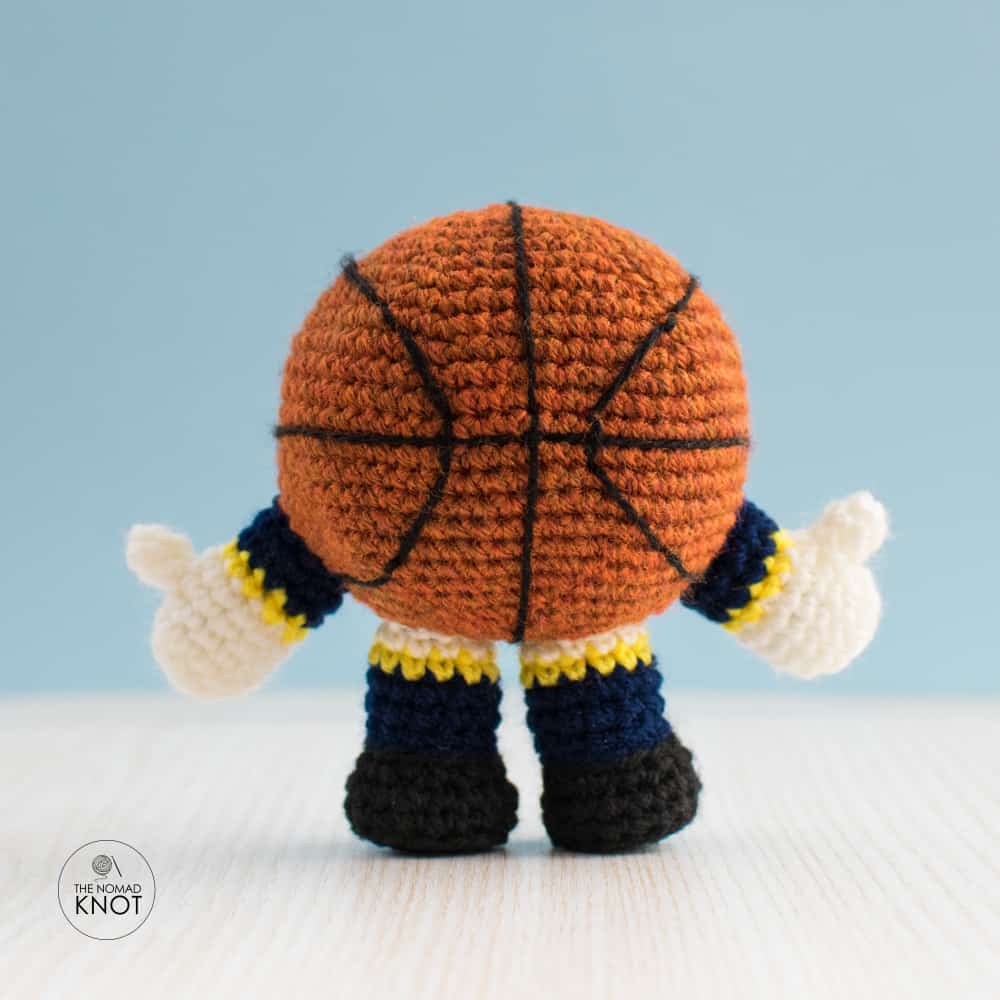
ASSEMBLY
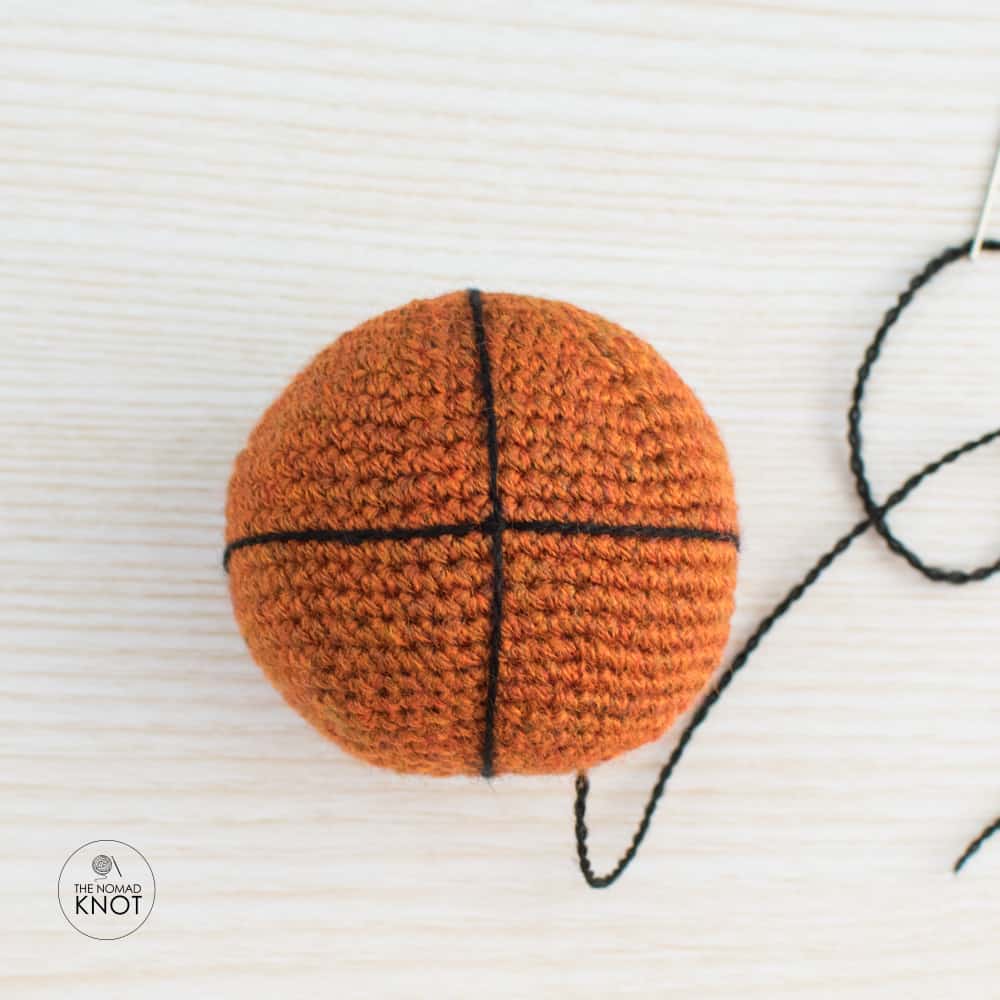
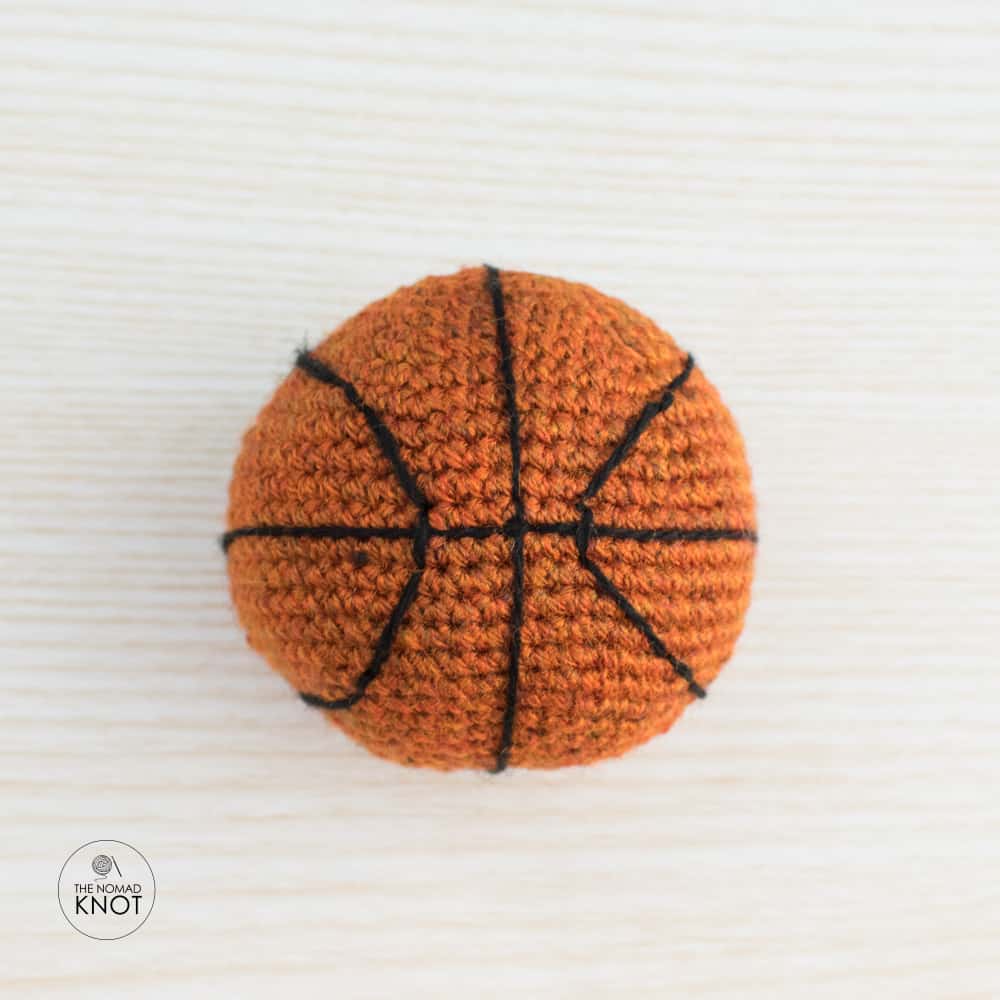
Start by making the lines on the basketball.
With black yarn, make a single line in the middle of the ball, horizontal and vertical. This will give you a starting point to make the sidelines.
Sew the legs in the middle part of the bottom of the ball.
Sew the arms 2 rows above the legs in the central part.
Sew the eyes in the central part, using the ball lines to guide you.
Behind the ball, with double thread yarn, embroider the number of the player (optional!)
CONGRATULATIONS!!!
You finished your amigurumi basketball mascot!
If you are happy with your results, publish a picture and tag me on any social media so I can see your final product!
This free amigurumi basketball mascot is one of my free pattern creations. You can check other free patterns in this part of my blog. They are all beginner-friendly, easy, and fast to make.
And if you want any amigurumi, in particular, write in the comment box below and I’ll schedule to create a simple pattern with your request!
For more advanced patterns, check the Etsy shop. All the patterns contain detailed explanations and a bunch of step-by-step pictures to help you complete your amigurumi toy! And of course, you can always consult me if you have any doubts! I will be happy to chat with you!
All right guys, that’s it for today!
Love,
Ana!
More from this collection
You may also like