The basic stitch and most used for Amigurumi crochet toys is the single crochet. Knowing this stitch will make you able to follow and even develop your Amigurumi!
In this article I’ll explain step by step how to do it, showing pictures of the movement. In the end, there’s a video with the full movement of the stitch showing how to do it.
If you want to move along and see other basic stitches, take a look at this list that might help you improve your amigurumi technique:
The abbreviation of single crochet on US terms is SC. This is important to know because most of the professional patterns are written in US terms.
For you to be able to single crochet, you need first, to start your amigurumi! And to start an amigurumi, the best way is by doing a Magic ring (MG).
So first, I will go with the step by step on how you do the magic ring, then, we move forward.
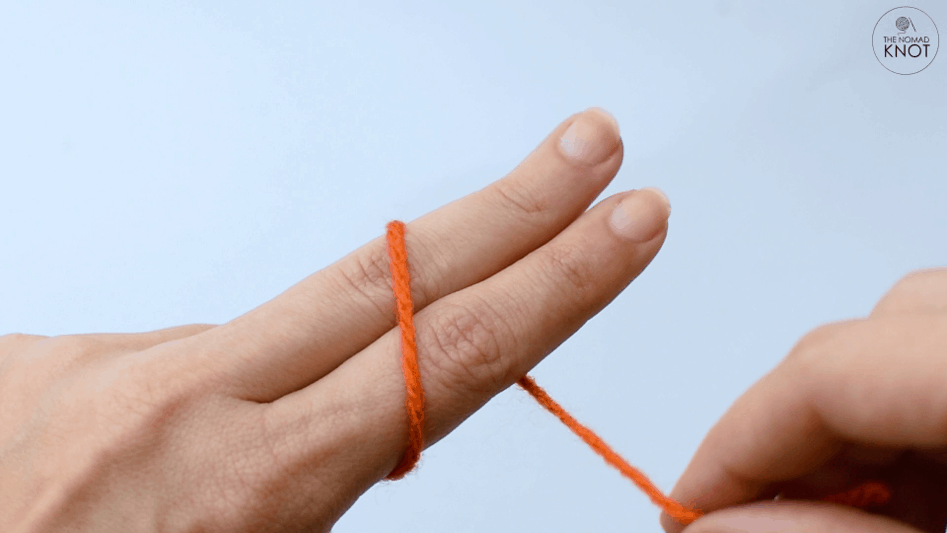
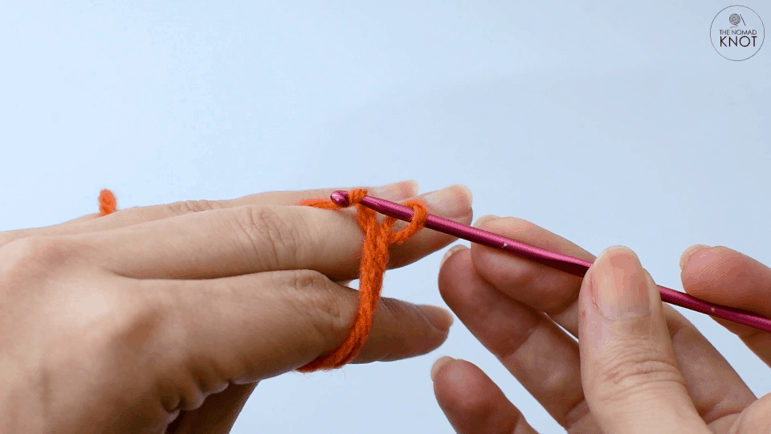
We are going to use two fingers of your left hand. The index finger and the middle finger. We will give two turns with the yarn around the fingers, which will create two loops
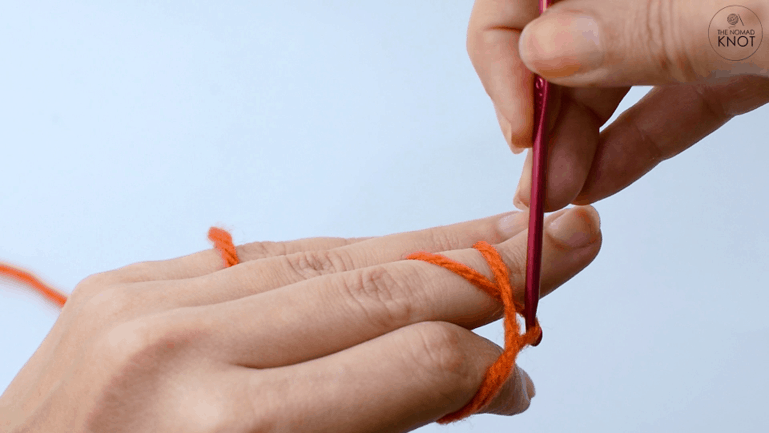
Pass the needle under the first loop, and over the second loop.
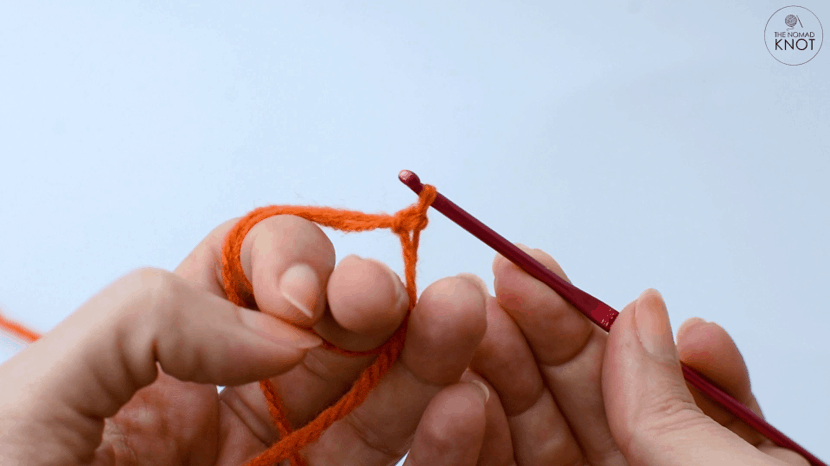
Pull the yarn under the first loop.
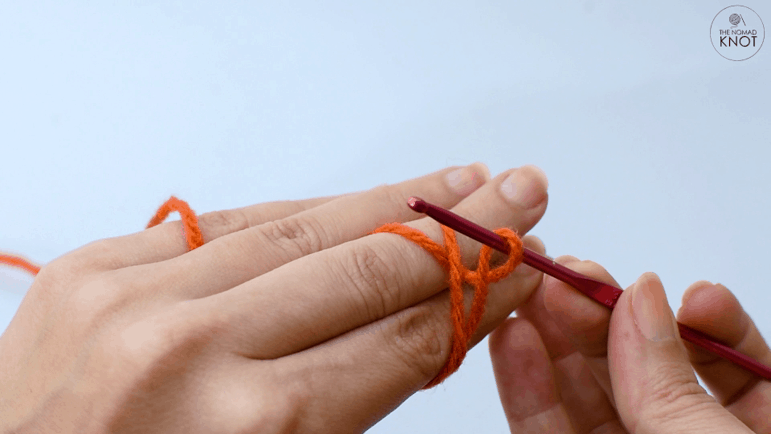
This will leave one loop on your needle.
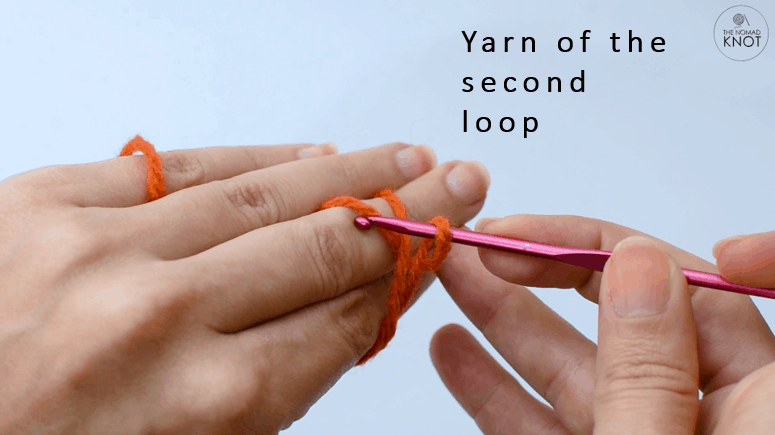
Pass the yarn of the second loop of your finger, over the needle.
Inside the loop on your needle.
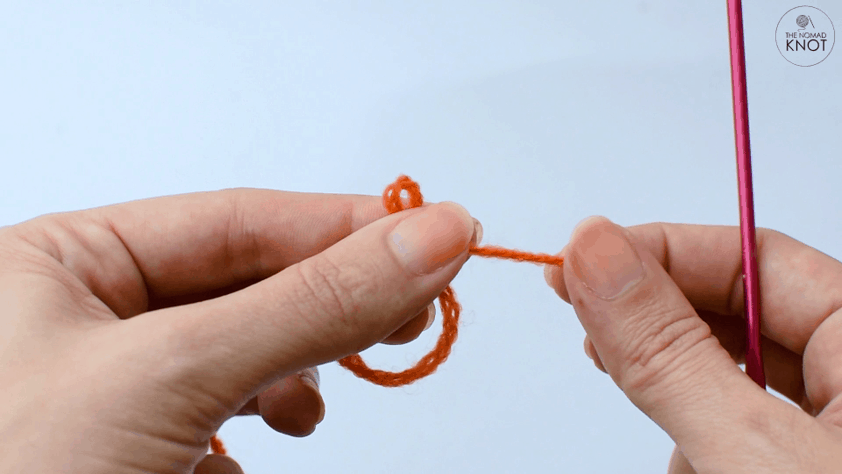
This will create the Magic Ring!!!
You can check if your magic ring is correct by pulling the beginning of the yarn. It should slide easily making the ring smaller or bigger.
It may look a bit complicated at first but don’t give up! Once you learn, you will see that is the best technique to start your amigurumi!
Before starting the single crochet, I want to show you the position I hold my magic ring while doing the first 6 single crochet of the project.
Some beginners have a problem to start a crochet toy because the magic ring is a bit loose, and you don’t have a good space to hold while making the single crochet.
So with this technique, your magic circle will be a success
Fun crochet quotes T-shirts! Great gifts ideas for a crochet lover!!
Hold the loop of the ring and the beginning of the yarn with your thumb and your middle finger. It will look like you are holding 3 strings. This will make tension on the yarn, making it easier and tight, to single crochet.
Continue holding in this position. Always moving your fingers up, closer to the stitches, so the yarn stays strained and tight, while you move forward with the stitches.
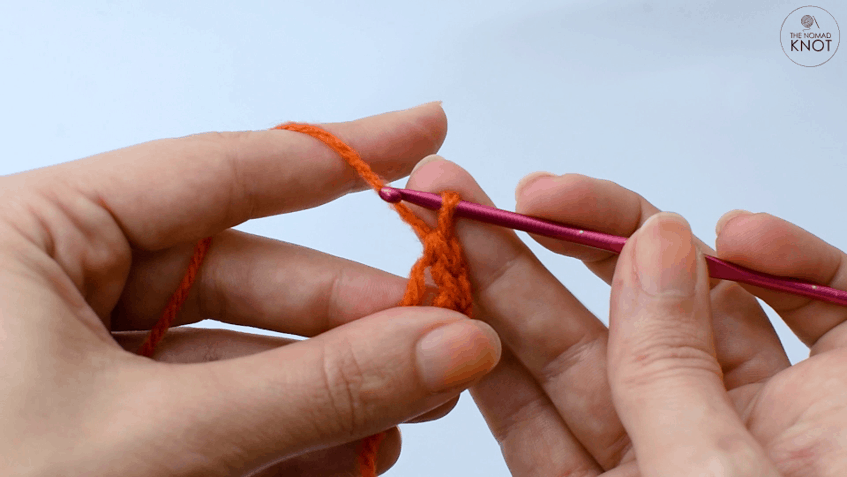
For you to better see how to single crochet, I choose a bigger detail. You will make the same movements inside your magic ring.
There are two videos below, one showing how to magic ring following up with the 6 single crochet inside the ring (most of amigurumi projects start with 6sc and are worked on with multiple of six). And the second one with the bigger detail showing how to single crochet.
Read the instructions below and watch the videos after! That will help you to understand!
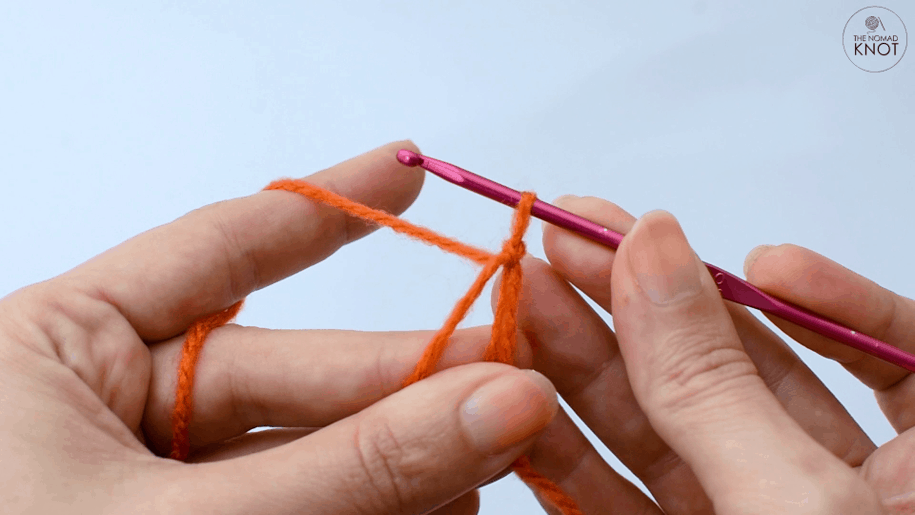
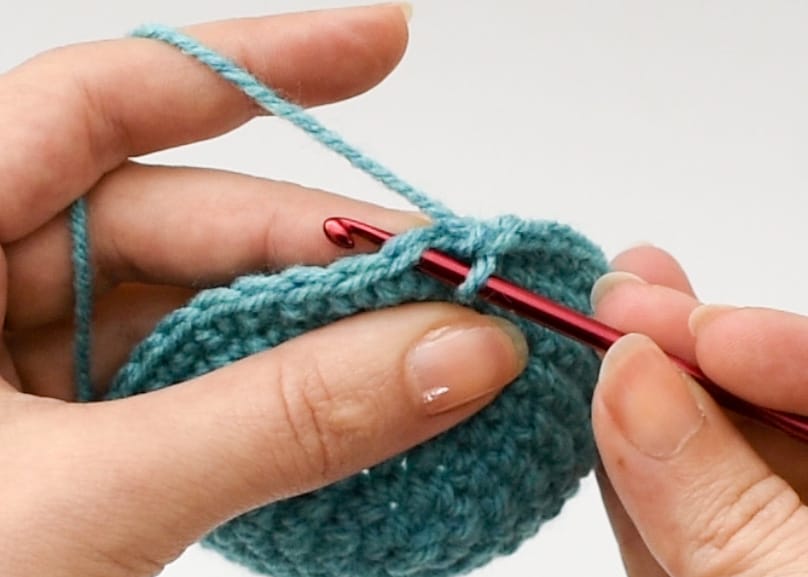
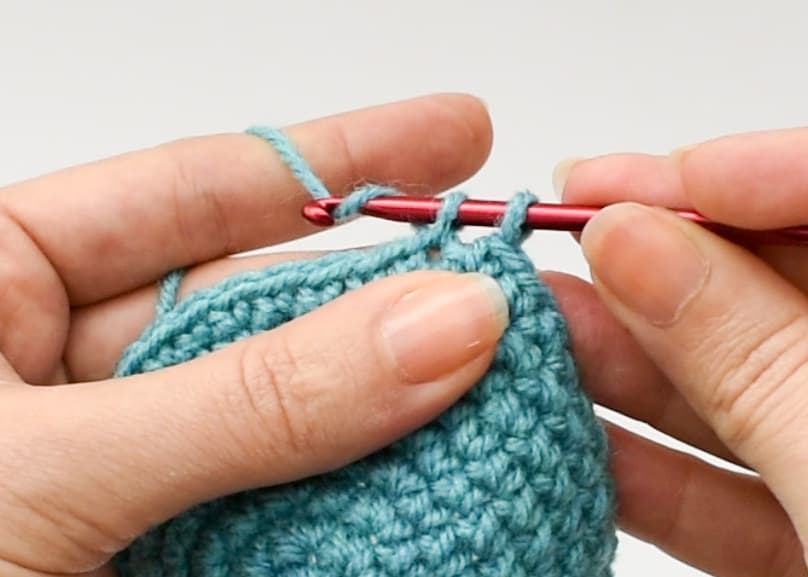
You are going to insert the needle in the middle of the stitch.
Pass the yarn over the needle
Pull the yarn through the stitch, having 2 loops on your needle.
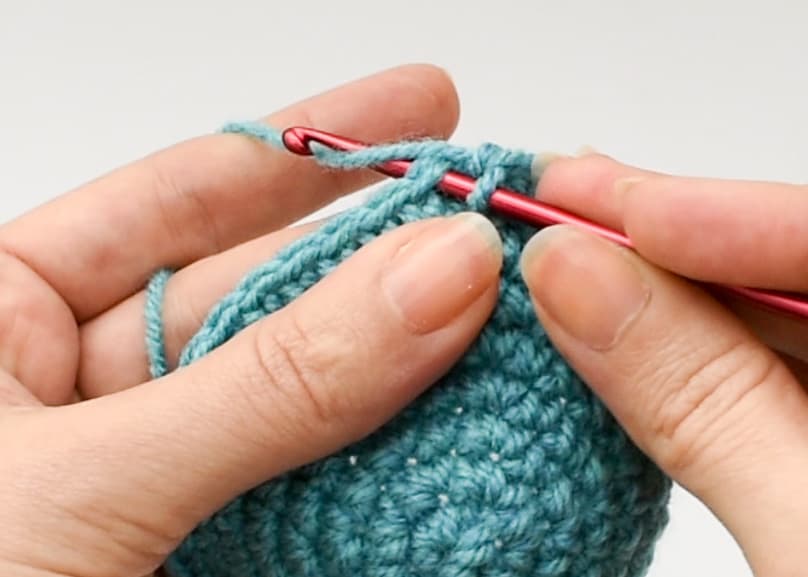
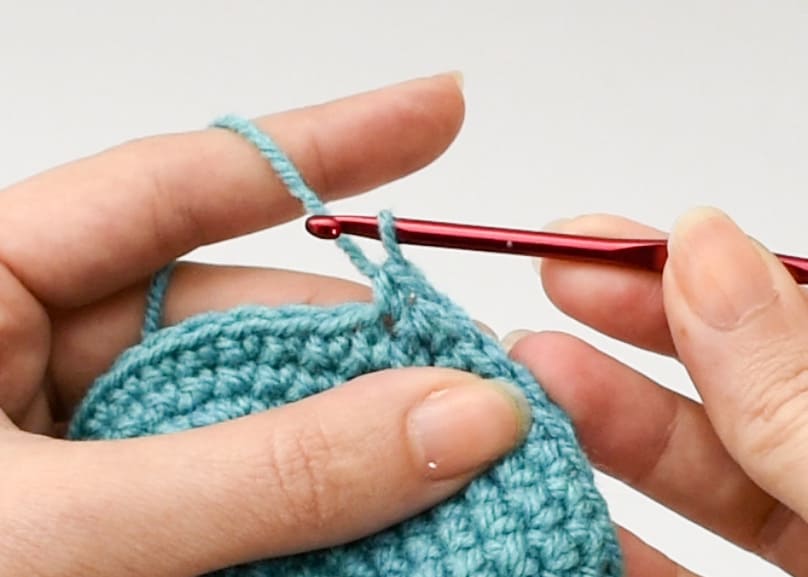
Then again you are going to pass the yarn over your needle.
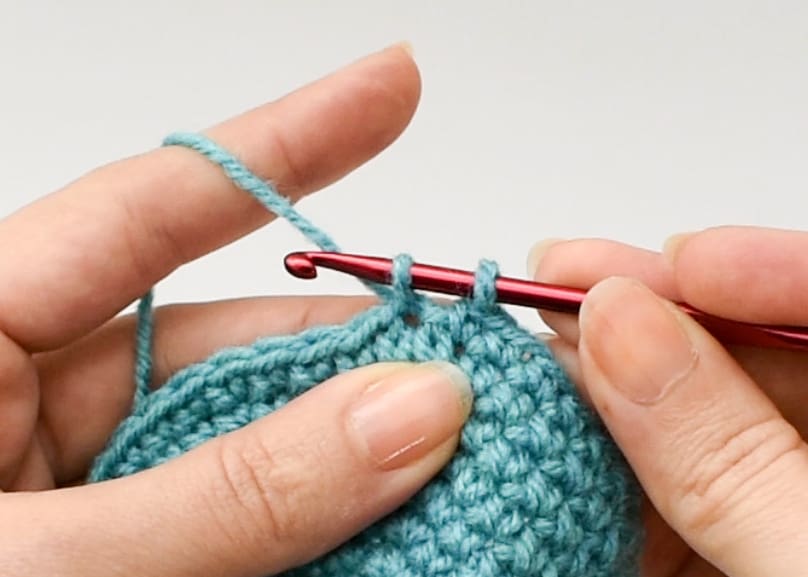
And pull inside the 2 loops of your needle.
And that’s it! You made your first single crochet! Easy right?!
Here is a small video with all these movements together, so you can see in motion how to do it.
Now that you know how to SC, I’ll leave a few tips that I think you should always have in your mind when crocheting amigurumi.
TIPS:
Most important to remember is to keep your stitch with a tight tension, this way, you won’t have any see-through gaps.
To help me keep my stitches tight, I prefer using yarn for a thicker needle than the one I would be using for the Amigurumi.
Always count your stitches after every row, so you will make sure to have the total amount of stitches.
Use a piece of yarn to mark the last stitch, so you won’t miss where the beginning and end of your row is!
If you are ready to start making your toy, take a look at all of my patterns here! And, if you love a beginner-friendly free amigurumi pattern, click here!!!
I hope this was helpful to you, if you have any questions leave them in the comment box below, I’ll be happy to help you complete your amigurumi!
")